My
ceramic pot BBQ Smoker is getting good enough results that I thought I should try and pretty it up a little. So I thought I'd start by giving it a nice table. It was a rainy weekend here in Halifax ... a perfect time to lock myself in the garage and work while the rain streamed down outside.
The design I settled on is loosely based on the
free DIY plans you can get on the Big Green Egg website.
My plans were a little more rough. I based them on the dimensions of my gas BBQ and the maximum space I had on the deck to place the finished table.
I knew I was going to paint this to match our patio furniture so I was able to go with cheap rough lumber.
Quick trip to the hardware store and I was ready. I can't praise the
Rockwell 48" JawHorse clamping work horse enough. It's an incredible machine!
Circular saw to get my notches in place.
Hammer and chisel to clean them up.
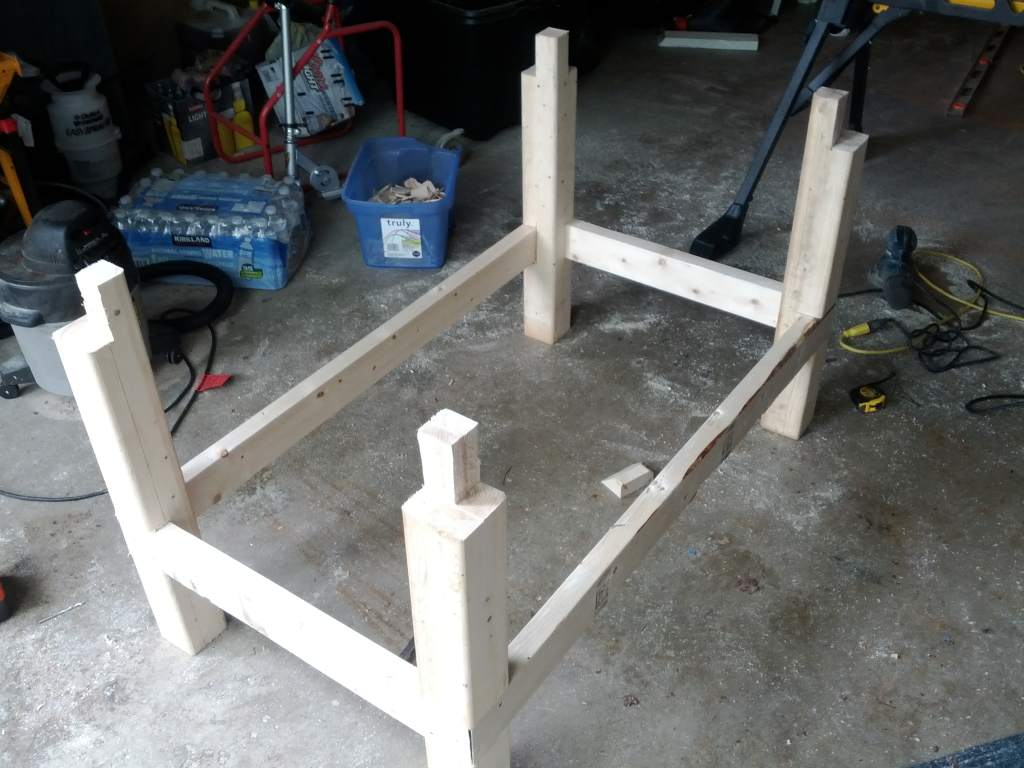
And, before you know it ... four legs. Had to include the height of the caster wheels in the cutoff.
The fit was so tight I hardly needed screws/bolts.
45 degree on the bottom shelf to try and make it a little nicer.
Dry fit ...
Now I could size out the table top. I had 66" max length to work with and settled on 64" at 28" width and 35" high (not too high to make it awkward lifting large, hot chunks of meat).
Some interior bracing is required so I can cut out the hole and not have it too flimsy.
Time to start bolting it together for real. I don't know what I was thinking when I bought these bolt lengths. Yeesh.
The boy helping me get the end caps on.
Bottom shelf braces. The bottom shelf carries all the weight of the smoker, so it needs to be solid.
And some cheap strapping in place for the bottom shelf.
Brad nailed into place.
Using some spare bolts to ensure proper spacing. I went a little wide on the spacing to make sure the rain water doesn't pool.
Caster wheels in place. These are 3" with brakes. They can handle 225 lbs each ... plenty. Picked them up at
Princess Auto on sale.
Now just to mark out the smoker hole and cut it out.
Bingo ...
Pretty well done. Just need to sand and paint it now. Not sure if I'm going to paint the terracotta pots with some black stove paint. I may.
The whole thing was about $100 and took about six hours to make.
The next blog post I do will be cooking in the finished product. Stay tuned! Although I am thinking about a pulley lift for the smoker top :) We'll see.
EDIT: Here's the follow up
http://www.sandymakes.org/2012/10/bbq-smoker-follow-up.html


so no follow up post? I'm vaguely interested in building something similar to your smoker, so I'm sad to see interest in this petered out.
ReplyDelete... thanks for the reminder. The followup link is in the bottom of the post now. Look forward to getting your thoughts!
Deleteand I assume you saw Part I of this series?
Deletehttp://www.sandymakes.org/2012/04/ceramic-pot-bbq-smoker-v6.html